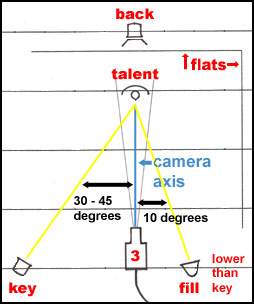
A simple photographic light plan.
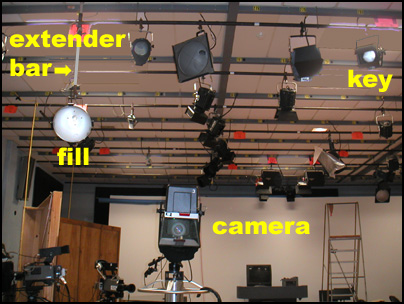
a. key light- this is the main light on the subject. It should be a fresnel spot light placed 30-45 degrees off the camera line and high up. Its purpose is to cast modeling shadows and provide basic illumination.b. fill light- this is a flood light placed opposite the key light about 10 degrees off the camera line and often lowered on an extender bar. It softens the shadows cast by the key light.
c. back light- this light separates the subject from the background. It should be a fresnel spot light with barn doors. It is placed behind the talent and aimed down at the head and shoulders. This is the most important light in making the picture appear 3 dimensional.
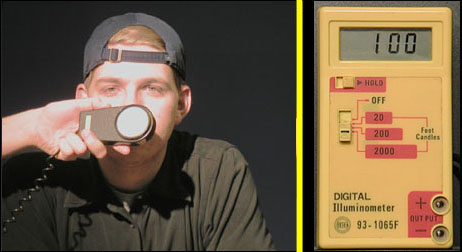
While the ultimate tool for setting lights for video is a properly adjusted studio monitor, light meters can be very helpful for new gaffers to assure proper ratios between the 3 lights of the photographic system.
We usually set the back lights first because they are placed either over or slightly behind the flats that make up the back of the set. Once they have been set and focused, the lighting crew can move out into the studio and the set crew can work on the set while the key and fill lights are being hung and focused.
There should be a key, fill and back light for each talent or each major acting position. They should be set and focused as follows:
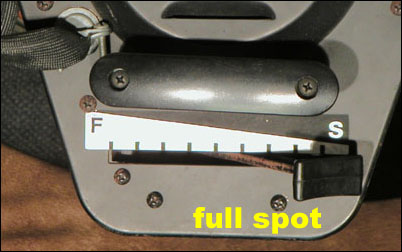
1. Back Lights- Hang these fresnel spot lights approximately one grid bar directly behind the talent. Adjust the light to full spot and focus it on the space between the talent's shoulders (or where that would be if the talent is sitting in a high backed chair).
Have an assistant hold an incident light meter at the talent's shoulder blades, pointed directly at the back light. Gradually flood the light until a reading of 75 foot candles is obtained on the meter. Then close the barn doors so that the light just illuminates the top of the talent's head and stops at his or her shoulders.2. Key Lights- Hang these fresnel spot lights at least three grid bars away from the talent and 30 to 45 degrees off the camera axis. Adjust the light to full spot and focus it on the talent's nose. Tighten all bolts so the light will hold this position. Then with an assistant holding an incident light meter in front of the talent's nose, gradually flood the light until a reading of 100 foot candles is obtained on the meter. Adjust barn doors as necessary to prevent light spilling where you don't want it.
3. Fill Lights- Hang these flood lights (scoops or broads) at least 3 grid bars away from the talent and about 10 degrees off the camera axis on the opposite side of the camera from the key. It is frequently a good idea to lower these lights using an extender bar so that they will fill shadows under the talent's chin better. Aim the light at the talent's nose and lock all bolts so the light will hold this position.
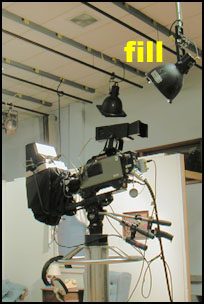
While some of our flood lights have a spot/flood control, we usually adjust the intensity of the fill light by placing scrim or diffusion material over the light until we get a meter reading of 75 foot candles.
In the image below you can see approximately how the key and fill lights diagrammed on the light plan above would appear to the talent looking toward his/her main camera.
Always use the safety chains attached to each light and extender bar, and make sure barn doors are securely attached to their instruments. While all bolts should be tightened once a light is focused, pay special attention to yoke bolts, as they are most likely to allow a light to fall if they become loose.
